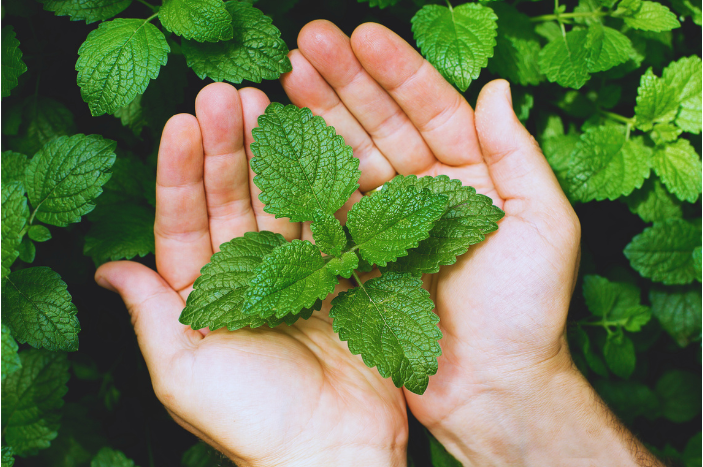
If you’re a mint lover and want to understand how important is to harvest this herb, you can get all the necessary information in this article.
Mint is a cool, aromatic, and refreshing herb, widely used around the world in an array of recipes, from chutneys and desserts to cocktails, curries, and teas. Besides its culinary uses, mint is also popular in beauty products and is a common ingredient in toothpaste, mouthwash, and chewing gum.
With over 30 species growing across all continents except Antarctica, the most popular varieties in the culinary world are spearmint and peppermint. Mint can be enjoyed fresh, dried, powdered, or frozen. If you love the cool and refreshing flavor of mint, why not elevate your enjoyment by growing it in your garden? Mint is easy to cultivate, but keep in mind that it can be invasive, so it’s best to grow it in containers to prevent it from spreading.
How you prune your mint plants significantly impacts their growth and health. Whether growing mint in the ground or containers, following best practices is vital. Knowing how to store mint properly is equally important.
Best time to harvest Mint Leaves
The ideal time to harvest mint leaves is before the plant flowers, typically mid-growing season. However, you can start picking individual leaves once the plant reaches at least 4 inches in height. For fresh consumption, harvest green leaves as needed. To collect a larger amount, cut your mint plant 3 to 4 times during the growing season. Mint plants generally regrow within two to three weeks, and maintaining moist soil around them ensures a quick recovery.
Gardeners with outdoor mint may consider bringing their plants indoors during winter to protect them from frost, although mint usually regrows in spring. Indoor mint plants can take up to a year to mature.
Mint should be harvested in the morning as the dew starts to evaporate from the leaves. During this time, the essential oils in the plant are at their peak, providing the leaves with the most potent aroma and flavor.
Another key factor in harvesting mint is the plant’s age. Regular pruning encourages plants to produce foliage rather than going to seed. If your mint starts seeding, cut it before the flowers appear for the best flavor. Once flowering, mint may develop a slightly bitter taste.
Harvesting Mint
Harvesting mint is simple. For a few leaves, just separate them from the stems. If you need a larger quantity, use pruning shears or sharp scissors to cut the stems and leaves. Felco 321 Harvesting Snips or Felco 322 Long Reach Harvesting Snips are also great options. Strip the leaves from the stems for fresh use, or tie the stems together for drying.
For bigger harvests, wait until after flowering when the flavor is stronger. Remove yellow leaves before harvesting and cut each stem above the first or second set of leaves to ensure continued chlorophyll production as the plant recovers.
Remember, younger leaves are more flavorful than older ones. Pick smaller leaves first to enjoy more intense flavors and encourage new growth. With regular pruning, your mint plants will grow bushier and more flavorful.
Avoid cutting more than two-thirds of the plant, as over-pruning can shock mint plants, especially early in the season. Always use a sharp, sterile tool to make a clean cut, as a broken stem is more susceptible to disease.
Storing Fresh Mint
Freshly harvested mint stores best in cool temperatures. Wrap chopped mint leaves in a damp paper towel, place them in a perforated plastic bag, and refrigerate. This method keeps mint fresh for 7 to 10 days.
Alternatively, place fresh mint stems in a glass or jar with 1 to 1.5 inches of water. Loosely cover the top with a plastic bag to retain moisture. Change the water daily. This way, mint can last 10 to 14 days.
Drying Mint
While dried mint lacks the aroma and taste of fresh mint, it’s a great way to store it long-term. Rinse the stems with cold water before drying, and avoid heat to preserve the flavor. Air dehydrators or box fan drying are options, but hang drying is also effective.
Hang a bunch of mint stems upside down in a dark, airy place. Cover the leaves in a brown paper bag and let them dry for 1 to 2 weeks. Once the green leaves easily fall off, remove them from the bag and separate the leaves from the stem.
After drying, store mint in a glass container like a mason jar. Open the jar daily to mix the contents, allowing any remaining moisture to equalize and reduce mold risk. You can also add a desiccant packet to the jar. Properly dried and stored mint can last 1 to 3 years, but for the best flavor, use it within the first year.
Freezing Mint
If dried mint isn’t your preference, freezing is another option. Harvest your mint, then prepare it for freezing. You can cut the leaves into small pieces and pack them into ice cube trays. Add just enough water to bind the leaves, then freeze. Once solid, transfer the cubes to a freezer bag. Mint ice cubes are perfect for iced tea and recipes, lasting at least three months.
Alternatively, line a baking sheet with parchment paper, place whole mint leaves on it without overlapping, and freeze for 2-3 hours. Transfer the frozen leaves to a freezer bag. Though the leaves may soften upon defrosting, they’re still ideal for cocktails or salads.


